 The law that deals with beer, yet it is not the alcoholic kind. Beer's law is a linear equation that relates absorbance to concentration based on a constant coefficient that is defined for the given substance. The graph above is a screenshot from LoggerPro where we tracked absorbance levels in our experiment. Why? Beer's Law is used to determine the concentration of a solution. Beer's Law Symbols A= eBC A = Absorbance e = constant B = pathlength of the cuvette C = Concentration  To the left of me is a picture that clearly states that this blog isn't about alcohol. Beers Law states that the quantity of light absorbed by a substance dissolved in a non-absorbing solvent is proportional to the concentration of the substance dissolved. Beers Law can also be called the Beer-Lambert law or the Bouguer-Beer law. Beer’s law is a concept in Chemistry that we all know, but the thing is that you don't know that you know it. It states that the darker a solution’s color is, the higher concentration of a substance that solution has. Beer's law is written in the form A=ecl, where A is the absorbance, c is the concentration in moles per liter, l is the path length in centimeters, and e is a constant of proportionality known as the molar extinction coefficient. Beers law is used for dilute solutions. For the experiment my group and I did an Colorimeter Lab. We also had to include LoggerPro in the experiment to track our results. The main tool that we used for this lab was a Colorimeter. A Colorimeter is a device that uses light to test the absorbency of a solution sample. By using this it would give us the concentration, but before we could start we had to calibrate the sensor which was pretty easy once we figured out how to do it. Once it was calibrated and plugged in to the computer we then had to prepare six unknown solutions. The six solutions are used for comparison, so that we can see the concentration of our unknown substances, which this is the whole purpose of the lab which is to test unknown substances and see their concentrations by using light. The six solutions were various amounts of distilled water and Nickel (II) Sulfate (NiSO4). As hard as it sounds that is all you have to do. By using Beer's Law you can find concentrations of all kinds of unknown solutions. This law is cool because you can use light to find the concentration of an unknown substance.
0 Comments
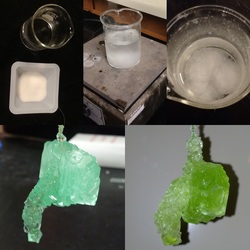 To the left is a collage of pictures that will give you a little rundown of what happens during a Crystal growing lab in Chemistry. It is fairly rather easy to make a crystal although it may seem like a long and tedious task. To start this experiment you fill a beaker with distilled water and then saturate with a powdered substance called Alum. When it is all put together that is when you put the beaker full of stuff on a Bunsen burner and begin to heat the solution and begin to add more Alum. After we did this you then have to wait for it to cool, which is the next day in class. To do this we used a hot plate with a white pill looking magnet inside to mix and heat the solution. My group took to the eyeballing side of the experiment. Which really just means that we didn't measure how much Alum we had used since the start which was that we started with 50 grams of Alum. So after we had dissolved all of the Alum we then added an unknown amount of yellow, blue and green food coloring to the mix to then later on turn out to be an aqua-ish color as shown in our half-way grown crystal in the bottom left picture. Wait now im not done just yet. Then two days later we came back and our crystal looked like the one in the lower left hand picture. So we took the crystal out of the beaker and made more of the Alum and H20 solution and we also changed the color. Which created a yellow and green mixture of food coloring to make lime green, that is why the color of the crystal changed. After we had given our solution a little boost or "steroids" you could say, the next day our crystal grew in size. Creating the end product in the lower right-hand picture.
P.S- We didn't plan for our crystal to grow in the shape it did. Hence we call it the elephant head shaped crystal..nothing else! hahaha For the Acid and Bases section of Chemistry we did an Acid-Base Titration Lab. So what is Titration? A titration is a process that is used to determine the volume of a solution needed to react with a certain amount of another substance. For this experiment we used a titrate hydrochloric acid solution, a basic sodium hydroxide solution which is also known as HCl and we also used NaOH. We were given the amount of concentration of the NaOH solution. The whole point of the lab is to determine the unknown concentration of the hydrochloric acid solution. In the experiment we used our laptop to monitor the pH levels as we titrated by using the application LoggerPro. The volume of the NaOH titrant we used at the equalivelance point is what we had to use to determine the molarity of the HCl. Before starting this lab make sure to put on a pair of goggles because you should always handle the hydrochloric acid with care. It can cause painful burns if it comes in contact with the skin. For the procedure we filled a pipet with 10 mL of the HCl solution into a 250-mL beaker. Then we added 50 mL of distilled water. Then we placed a sensor into the beaker full of liquid. And since my lab partners and I didn't have a magnetic stirrer and stirring bar we stirred the beaker by hand. Then we were able to begin the Titration when the pH stabilized. One person manipulated and read the buret while another person was operating the LoggerPro and changed the volume. Every time we changed the volume we had to save the data and then pair it for the next step of the experiment. For every new increment we had to add more of the NaOH solution which basically means we were changing the base solution that we started with at the start of the experiment and then change it to a very acidic solution by the end of the experiment. 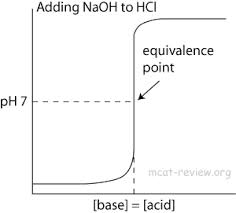 The graph to the left is the exact replica of the shape of the line that I guessed would happen with the Titration Lab. I guessed that the line would start at the very bottom because it is an acid and then it would start off slowly and then would increase and the line would begin to curve straight up because you are changing the acid to a base so quickly. And then once it was almost completely all a base the line will continue on without any change.  The graph to the left is our exact experiment data that we recorded during this lab on LoggerPro. And as you can tell it was very very similar to my hypothesis guess.
The worksheet packet below is all about Solutions. At the start of 4th quarter I was given this packet to start my adventures in the last leg of Chemistry. Throughout the packet was a series of questions surrounding what a solution is, solving a solution to true and false statements. We learned to read the data and then calculated the molarity of several solutions. A solution is a liquid mixture where the minor component (the solute) is uniformly distributed within the major component (the solvent). Around the edge of my packet I have written descriptions to things relating to Solutions, such as a soluble, a solvent and what a solution is. I hope this study guide can be used to help master the content surrounding Solutions. 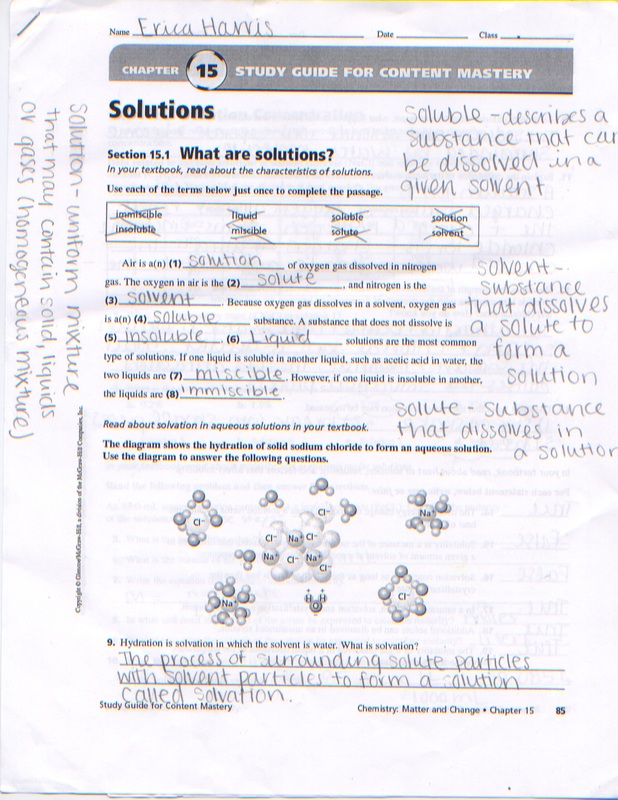 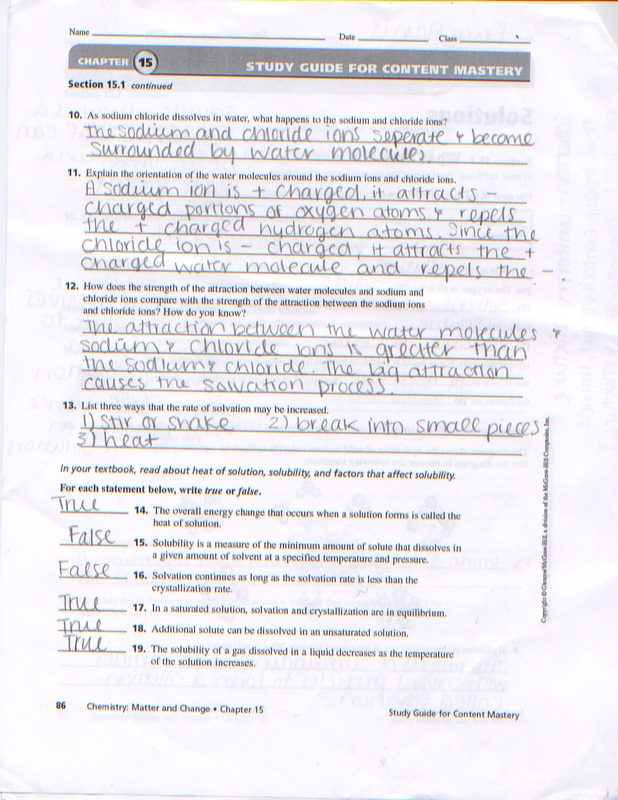  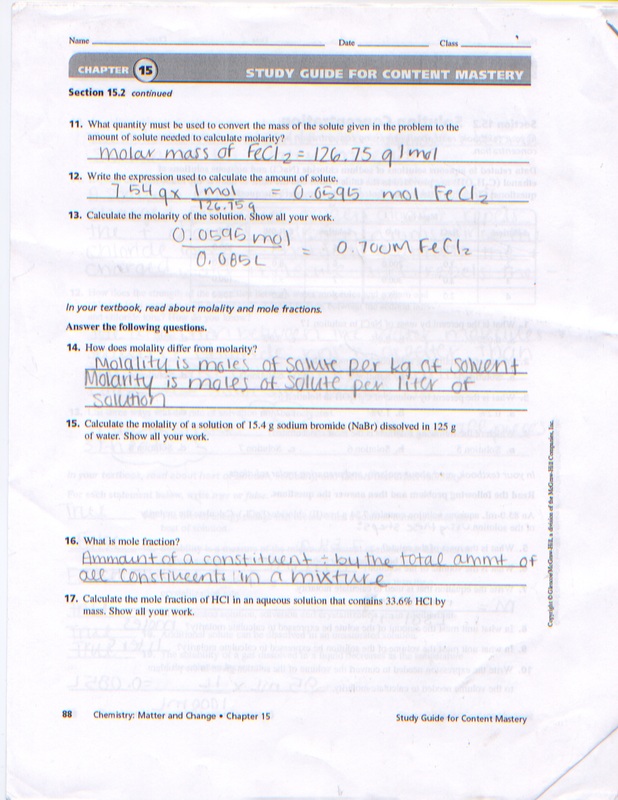 What is Bioremediation? The treatment of pollutant's or waste (oil spill, contaminated groundwater, or an industrial process) by the use of microorganisms (bacteria) that break down under undesirable substances. Process and its Types Bioremediation is the branch of biotechnology which deals with the methods of solving several different types of environmental problems. It also plays a vital role in cleaning the environment from pollutants and contaminants by using these microorganisms and fungi. Bacteria are the most important microbes in this process because they break down the dead materials into organic matter and nutrients. Not all types of contaminates can be destroyed with Bioremediation, heavy metals like lead and cadmium are not the type of contaminants that can be destroyed. Special types of contaminants like chlorinated pesticides can be easily digested by bacteria. Even oil spills can be cleaned up with Bioremediation. How does Bioremediation work? For Bioremediation to work the organisms involved have to be healthy and active so that they can be used productively and efficiently. Microorganisms don't have to detoxify the same contaminant and toxin but for different toxins there are different microorganisms because there are different habitats for different organisms. Bioremediation can take place in two conditions. Aerobic Anaerobic In anaerobic conditions, microbes need oxygen to perform their duty. If they will get oxygen in sufficient amounts they will be able to easily convert the contaminants and toxins into water and carbon. In anaerobic conditions, microbes do the activity in the absence of oxygen. Chemical compounds which are in the soil can be decomposed by bacteria. As a result energy produces which is used by the microbes. Types of Bioremediation Biostimulation is the method in which bacteria are motivated to start the process of Bioremediation. Nutrients and other important substances are released in the soil where there is need or removing the contaminants. In the form of gas or liquid. It increases the growth of microbes in that area. As a result bacteria and other microorganisms remove the contaminants quickly and efficiently. Bioaugmentation:- Special sites where microorganisms are needed to remove the contaminants. Example municipal wastewater. Bioaugmentation is used for that purpose. But unfortunately this process is not very successful as it is difficult to control the growth of microorganisms to remove the particular contaminant. Intrinsic Bioremediation:- Takes place in soil and water because these two places are always full of contaminants. Example underground petroleum tanks. It is difficult to know if there is a leakage in the petroleum pipes. Contaminants and toxins find their way to enter in these sites and create harmful effects. Only microorganisms can destroy the toxins and clean the tanks. Great care should be taken if some leakage occurs in the petroleum tanks or pipes because it may damage the human health. Oil Spill Activity I have chosen to do the Oil Spill clean up activity to demonstrate the different ways and techniques to clean up an oil spill.This hands-on experiment will provide an understanding of the issues that surround environmental cleanup. You will be able to create your own oil spill, try different methods for cleaning it up, and then discuss the merits of each method in terms of effectiveness (cleanliness) and cost. The link below will lead you to my Bioremediation Presentation on Google Docs. https://docs.google.com/a/lajunta.k12.co.us/presentation/d/1NtKl9RsNxuKB3CWTQ_2KgGCz4x6y_eDca_-Xmi4gjJw/edit 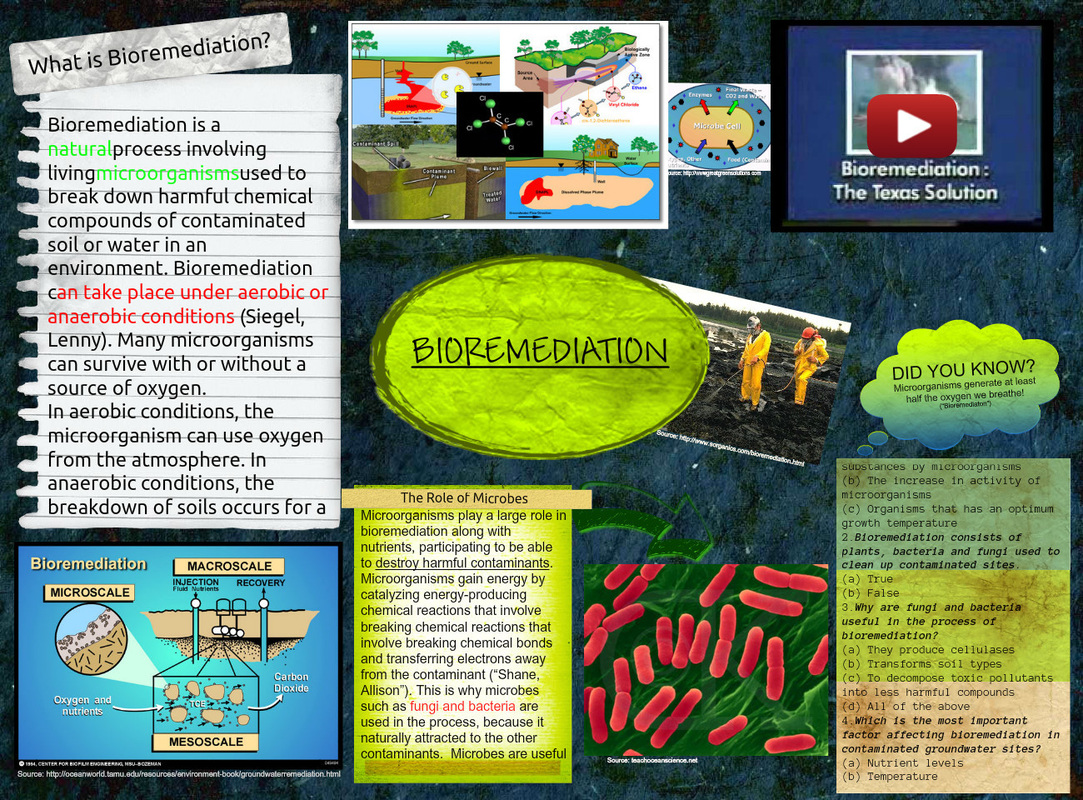  Baking Soda and Vinegar Lab
I think over the course of my life I have done this lab plenty of times. I just never realized that it related to Chemistry, let alone a chemical reaction that you can turn into a formula using the Periodic Table.The Baking Soda and Vinegar lab is the old "volcano reaction " lab, or at least that's what I thought when watching the reaction happening.To explain what is happening: The Baking soda is reacting with the vinegar and creates CO2 gases, like the kind we exhale and that cars produce. This is also what causes the fizzy taste in Cola and other sodas. There are all kinds of other experiments; one blows up a balloon, another blows up bottles. I really don't have much else to say because of the simplicity of this lab. Along with the Baking Soda and Vinegar Lab Post I will also be talking about Moles. What is a mole? A chemical mole is a unit of measure, just like a gram or an ounce. It is used internationally so that all chemists speak the same measurement language. The mole was invented because, well, it made sense. Scientists were having a hard time converting between atoms of an element and grams of an element so scientists came up with a "mole." Avogadro's # You might recognize 6.02x10²³ as Avogadro’s number; this number is used as a constant throughout chemistry, and here I'm going to use it to define the mole. Usually, moles refer to particles that make up a certain amount of an element, and we use moles to measure how much of a substance is reacting in a chemical equation. However, you can also measure other things in moles. Example: A mole of horses would be 6.02x10²³ horses . . . which is actually quite a lot. When you think about a mole as 602,000,000,000,000,000,000,000 horses, it seems like way too big of a number to be describing something that fits in a beaker in the chem lab! However, because atoms are so small there are bunches of atoms in everything we’re measuring. Therefore, a mole is actually a very appropriate way to measure chemical substances. Another benefit of using moles to measure substances is that it directly correlates to the number of atoms and molecules and grams. A mole tells you what fractional part of Avogadro’s number you’re working with. Example: If you have .25 mol, you would have .25 (or 25%) of Avogadro’s number, which is 1.505x10²³ (.25 * 6.02x1023=1.505x10²³). How do you convert Moles and Grams? Converting from grams to moles is really quite easy. The first thing you need is a Periodic Table. Then, read over the specific problem you want to complete and decide if you need to convert from grams to moles, or from moles to grams. After you’ve identified the problem and the conversion, find the element you are working with on the periodic table. Then, locate the atomic weight. If you are converting an amount in grams to moles, you will be dividing by the atomic weight. If you are converting an amount in moles to grams, you will be multiplying by the atomic weight, but if you use dimensional analysis you will not have to worry about figuring out the operations before you do the problem. Dimensional analysis is similar to setting up a table and it is waaaaayyy easier to understand. Stoichiometry is all about the amount of substances that are involved in a chemical reaction. You can use stoichiometry to find the amount of a substance before a reaction, or even how much of a material that is produced after the reaction. Reactions are dependent on the amount of product you have. So stoichiometry can help you figure out how much of a compound you will need, or how much you should start off with. Almost all of there equations can be solved in 4 steps, and at first it may seen hard, but after practice it becomes easier. 1.Balance the equation. 2. Convert units of a given substance to moles. 3. Using the mole ratio, calculate the moles of substance yielded by the reaction. 4. Convert moles of wanted substance to desired units. 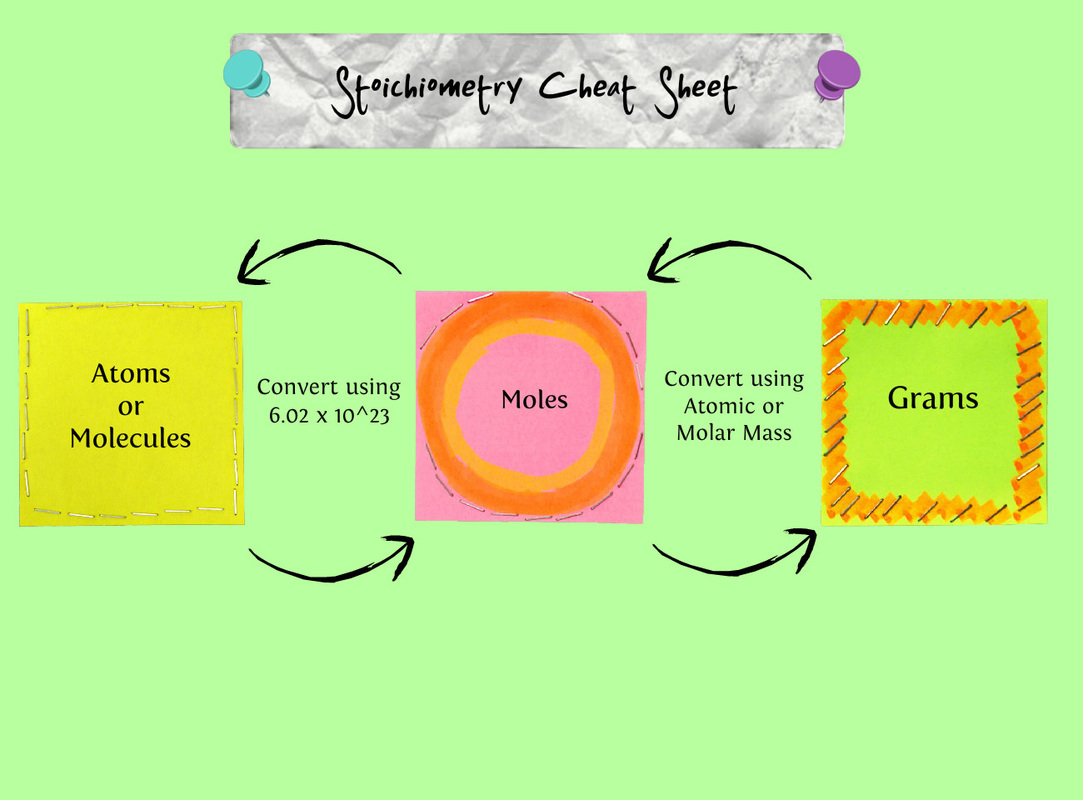 #1 20 Ml of Distilled Water 2 Grams CuCl2 1.6 Grams Aluminum #2 20 Ml of Distilled Water 4 Grams CuCl2 1.8 Grams Aluminum #3 30 Ml of Distilled Water 2 Grams CuCl2 2.2 Grams Aluminum The green color is the experiment is the copper ions reacting, which then created the maroon color at the end of the lab. The maroon copper is the aluminum being displaced by the copper. The less aluminum to copper chloride will create a less intense reaction. Distilled water - The tap water will change the reaction, but you can use either tap or distilled water. You can even do the same lab twice with both types of water and compare. What eventually happens when you put Aluminum and Copper Chloride together? When you put aluminum in copper chloride, the copper together the chloride eats away at the aluminum. There is a slight burning smell and smoke as a result of the chemical reaction. As the copper chlorides works away at the aluminum, the aluminum turning into a darkish maroon color. 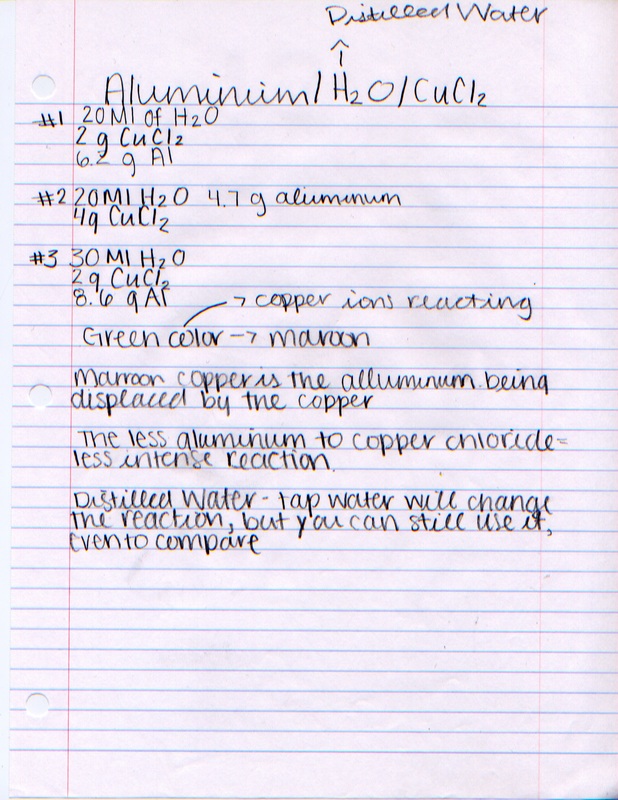 There are all kinds of Chemical Reactions that happen around us all the time. By being able to identify and classify these reactions helps us to make sense of them and we are then able to predict the product. In this lab involving Silver and Copper I was with a group of two others. The whole end product of the lab was to make silver metal. This lab was separated into a three day time span in order to make our own silver. Copper wire reacts with aqueous silver nitrate. The relative amounts (moles) of reactant and product are determined from the mass loss of the copper wire, the starting mass of the silver nitrate, and the mass of the silver metal obtained. During this lab the copper will be changed from its elemental form to its aqueous blue ion form. At the same time, silver ions will be removed from the solution and will be deposited on the wire in the elemental Ag metallic form. Day 1: On Day 1 we cut 30 cm worth of copper wire and then dinner it down with steel wool. And them we coiled the wire around the pencil forming a loose coil. Then we stretched the site so it would be able to for inside of the tube. We then made sure to measure everything used in the lab. Including the coil, and the dish of silver nitrate. Which we all used the specific amount of 1.0 gram. After we poured the silver nitrate into the test tube with the copper coil we put distilled water until the water was 2 cm from the top. And then we covered the top with parafilm ( wax paper on steroids, its actually pretty fun and cool to mess with.) We then waited till Day 2 to continue with the lab. Day 2: For day two we took a piece of filter paper and used it to separate the silver. And then we shook the test tube to separate the copper wire from the silver. Them we set up a funnel with the filter paper. With a waste beaker under the funnel we carefully lifted the copper wire out of the test tube and held it over our magical filter system. Then we washed the silver off with water and it ran down the wire onto the filter. After we did this we wanted the copper to dry so we put it on a piece of paper. Then we separated the silver. Then you have to wait for it to dry overnight. Day 3: Day three was the easiest out of them all. All we had to do was weigh the copper coil and record its mass. And also weigh the silver and filter paper and then record it's mass. Mass of silver nitrate: 1.0 gram Mass of copper coil before reaction: 3.44 grams Mass of copper coil after reaction: 3.252 grams Mass of filter paper & silver: 2.165 grams Mass of filter paper: 1.52 grams Mass of silver produced: .645 grams The correct equation for the Chemical Reaction is 2AgNO3 + Cu --> Cu(NO3)2 + 2Ag How close were your actual results to the results that you calculated? gAg .645 grams gCu .188 grams  After about fifteen minutes after we placed the copper in the water with the silver nitrate this is what it looked like. 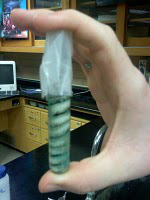 What is Dimensional Analysis? Sound scary. Well it's not all that bad. Dimensional Analysis is a mathematical system using conversion factors to move from one unit of measurement to a different unit of measurement. For example, if you need to calculate how many seconds are in a day, you can use dimensional analysis to set all of your needed conversions into one problem. Dimensional Analysis is both very helpful in Science and as well as in Math. The work I have shown below is some notes and examples I did during class in Chem. When do you use Dimensional Analysis in Chemistry? Conversion factors and dimensional analysis make comparing different units much easier. These conversions are necessary in many calculations in Chemistry. Equations in physics problems may require calculations using derived units. Derived units are those that contain two separate measurement units that are used as one. Example: The unit for force is a newton (N). A newton is equal to 1 kilogram x meter/second . Calculations in chemistry require comparisons of measurements of material in solid, liquid, and gas form. Dimensional analysis makes these comparisons easier by placing all known measurements into an equation that you have to work out like the ones written below. 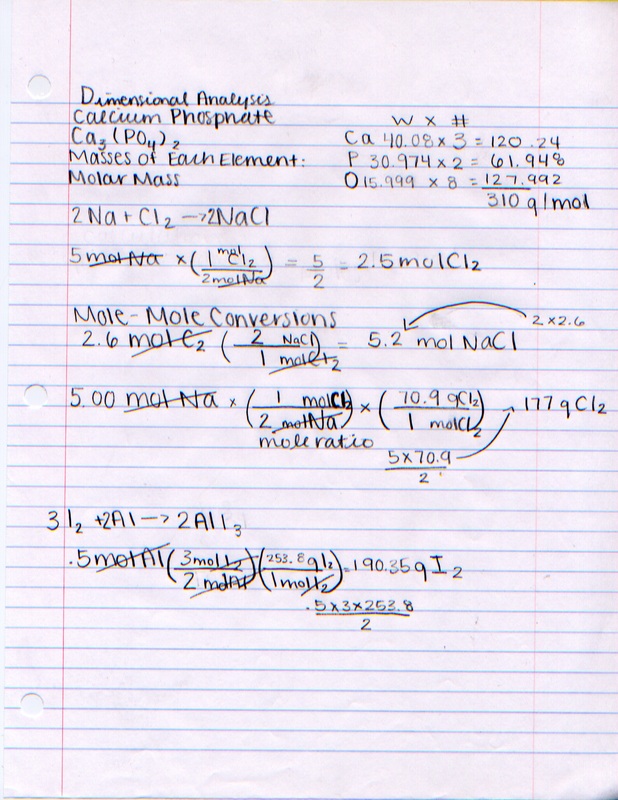 Below is a worksheet all about Chemical Reactions. On the front there are 8 listed statements and for each one I wrote yes if there was evidence of a chemical reaction. When I wrote no that meant there was no evidence of a chemical reaction. On the bottom half of the worksheet I just filled in the blanks of the passage. It related to reactant's and product's. On the back of the page I took the Chemical Reaction given then wrote the balanced chemical equation. So what exactly is a Chemical Reaction? A chemical reaction is the change of a substance into a new one that has a different chemical identity. How can you tell if a reaction is happening? When there is a chemical reaction happening you can physically see changes. Example: The emission of heat and light, the formation of a precipitate, the evolution of gas, or a color change. But the only way you will know if a chemical reaction is really happening is validation with a chemical analysis of the products. There are 5 Types of Chemical Reactions. 1. A + B --> AB Synthesis- Two things becoming one 2.AB --> A + B Decomposition - A single compound undergoes a reaction that produces two or more simpler substances. 3. A + BC --> AC + B Single Replacement (Displacement) One element replaces a similar element in the compound. 4. AB + CD --> CB + AD Double Replacement- The ions of two compounds exchange places in an aqueous solution to form two new compounds. 5. Combustion- A substance combines with oxygen, releasing a large amount of energy in the form of light and heat. For organic compounds, such as hydrocarbons, the products of the combustion reaction are carbon dioxide and water. So there you have it, a brief summary all about Chemical Reaction. 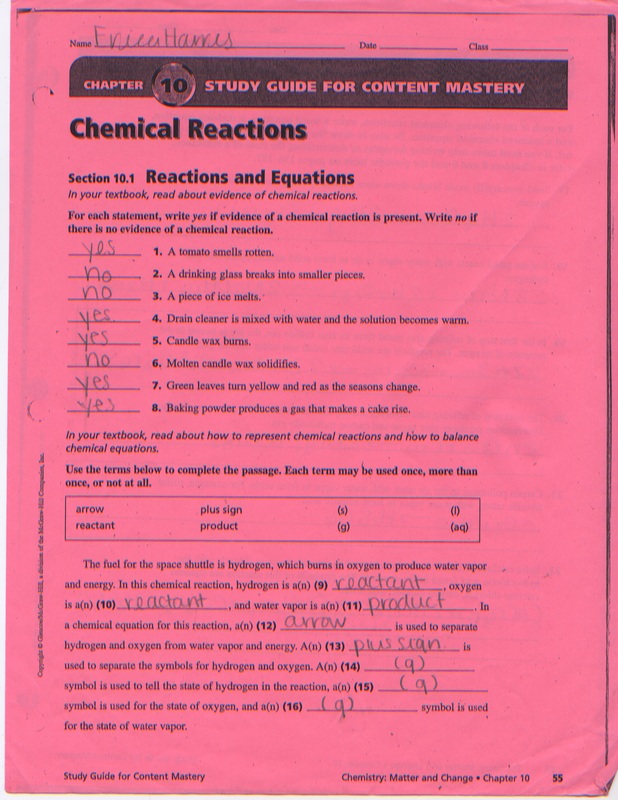  
This blog post I'm creating is for the purpose to help you understand the five different types Synthesis, Decomposition, Single and Double Replacement, and Combustion. At the end of this post I hope you have a better understanding of how to determine different types of reactions and how they happen.
Reaction Types: 1.A + B --> AB Hydrogen Nitrogen H2 + N2 --> NH3 / Ammonia --> NH4+/Ammonium NO3 Synthesis: Two things becoming one. 2. AB --> A + B Decomposition: The opposite of synthesis. H2O --> H2 + O2 <-- Electricity in Water 3. A +BC --> AC + B Single Replacement (Displacement): Oxidation-reduction chemical reaction when an element or ion moves out of one compound and into another - that is, one element is replaced by another in a compound. Mg + AgNO3 --> Mg(NO3)2 + Ag 4. AB + CD -> CB + AD Double Replacement: A chemical reaction between two compounds where the positive ion of one compound is exchanged with the positive ion of another compound AgNO3 + MgCl2 --> AgCl + Mg (NO3)2 5. Combustion: The process of burning something. fuel + O2 --> Propane C3H8 + O2 --> H2O + CO2 Octane C8H18 + O2 --> H2O +CO2 H2+ O2 --> H20 No CO2 We did the Types of Reactions Lab Activity to discover the characteristics of different types of reactions. There are a large variety of chemical reactions that are happening around us all the time. By classifying these reactions it helps us to make sense of them and enables us to predict certain types of products. This activity I did can help to better understand and gives the opportunity to learn and apply one classification scheme. 
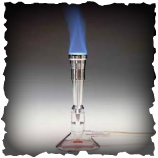
Bunsen Burner- Used in several of the reaction's in the lab.
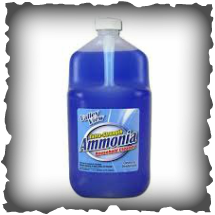 Ammonia the nastiest smelling substance I believe that is out there! (Besides a dead skunk being run over by a dump truck!) :) We did the Types of Reactions Lab Activity to discover the characteristics of different types of reactions. There are a large variety of chemical reactions that are happening around us all the time. By classifying these reactions it helps us to make sense of them and enables us to predict certain types of products. This activity I did can help to better understand and gives the opportunity to learn and apply one classification scheme.
Reaction #1 In the first reaction we took a test tube and filled it half full with Hydrochloric Acid, then put it in a rack and then put a strip of magnesium metal in the tube and had my partner hold the second test tube in an inverted position over the tube containing the acid and magnesium. We held the position until the chemical reaction was over. We then lit a match and tested the remaining gas in the test tube. We recorded observations of the reaction of a popping sound once we lit the match which then created the gas H2. Magnesium + Hydrochloric Acid --> Magnesium Chloride & Hydrogen 2HCL +Mg --> H2 +MCl2 Single Replacement In reaction two we lit a Bunsen burner and took a pair of tongs and held a small strip of magnesium over the flame. Let's just say you shouldn't stare straight into the light. The magnesium turned into a bright flare like light. And if you stared long enough like I did your vision is blurry for around five minutes and then it's all good. After it all burned out I placed the ashy product on a watch glass. Reaction #2 Magnesium + Oxygen --> Magnesium Oxide Mg +O2 --> MgO 2Mg + O2 --> 2MgO Synthesis Reaction #3 Copper + Oxygen --> Copper(II) Oxide 2Cu + O2 --> 2CuO Synthesis I would have to say that the fourth part of the lab was the worst one. Once I explain you will soon understand. In this reaction we took a small amount of ammonium carbonate into a test tube and then heated the bottom of the tube we were then told to waft the gas coming out of it. No, not a good idea. Do you know what ammonia is? It is a colorless gas with a charachteristic pungent smell. Cat litter that hasn't been changed in weeks will come into mind when you do this chemical reaction. Not one of the best labs I have done. Reaction #4 Ammonium Carbonate + Heat --> BBQ Smell/ Cat Litter/Ammonia (NH4) 2CO3 Heat --> 2NH3 + CO2 + H2O Decomposition Reaction #5 Hydrogen Peroxide + Manganese Dioxide = H20 + Manganese Dioxide + O2 H2O2 = H20 + O Decomposition Reaction #6 Potassium Iodide + Lead (II) Nitrate --> Lead (II) Iodide + Potassium Nitrate KI + Pb (NO3) --> Pb2 + KNO32 Double Replacement Reaction #7 Copper (II) Carbonate + Heat --> Carbon Dioxide + Copper (II) Oxide CuCO2 --> Co2 +CuO Decomposition Gases Produced -smothered fire -CO2 -explosion/popping sound -H2 -reignite/light -O2 Overall I really enjoyed this lab because there were 7 diverse types of Chemical Reactions to choose from. My favorite lab was where we heated the bottom of the test tube and created the ammonia smell. I loved this one but hated it at the same time, because I have a new found respect for the smell of ammonia. Next time I have to do a lab with ammonia I will waft it and not straight up smell it 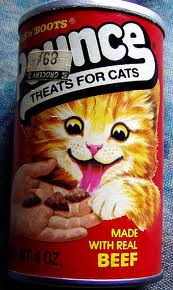 If your Cat took Chemistry, Would she eat this stuff? That was the question for the topic on this lab. We had to look at a list of ingredients for Puss n Boots Pounce (shrimp flavor) treats for cats.
In the long list of ingredients there were 11 bold listed ingredients to investigate on. The purpose of this activity was to practice writing formulas for simple inorganic compounds whose names are found on labels of products in the store. We had to use the list of ingredients on the cat food to learn how to spot ionic compounds in products and use ion reference charts to see which ions are present. Calcium/Sulfate Ca+2 SO4-2 Potassium/Chloride K+ Cl- Salt: Sodium/Chloride Na+ Cl- Calcium/Carbonate Ca+2 CO3-2 Ferrous/Sulfate Fe+2 SO4-2 Zinc/Oxide Zn+2 O-2 Cupric/Oxide Cu+2 O-2 Cobalt/Carbonate CO+2 CO3-2 Manganous/Oxide Mn+2 O-2 Potassium/Iodide K+ I- In the light spectrum lab we went into the Chemistry Room and watched Mr. Ludwig demonstrate the change the color behind the light. Light and color have intrigued humans since the start of time. In this experiment, we looked at several aspects of light including:
What is the Electromagnetic Spectrum? The electromagnetic spectrum is the range of all possible frequencies of electromagnetic radiation. The "electromagnetic spectrum" of an object has a different meaning, and is instead the characteristic distribution of electromagnetic radiation emitted or absorbed by that particular object. Continuous Spectrum This spectrum is an emission spectrum that consists of a continuum of wavelengths. It has no separation. Absorption Spectrum- red The Absorption Spectrum is a spectrum of electromagnetic radiation transmitted through a substance, showing dark lines or bands due to absorption of specific wavelengths. It absorbs the color green. Blue in front of Light (Absorption Spectrum) When you put the color in front of the light it loses all of the colors. Rainbow Bar Code (Emission Spectrum) For this spectrum we used a neon bulb. Mercury When mercury was used I was able to see the colors purple, green, orange and a tint of yellow. Iodine Vapor In the Iodine Vapor demonstration I seen a purple/white light. Hydrogen When we used hydrogen I observed purple, green, orange and red. The energy of a photon, or quantum is related to it's:
Frequency The behavior of Cathode rays produced in a glass tube containing gas at low pressure led scientists to conclude: The rays are composed of negatively charged particles. The set of orbitals that are dumbell-shaped and directed along the XYZ and axes are called: P Orbitals The element with electron configuration 1s22s22p63s23p2 is" Silicon z=14 Visible light, X rays, Infrared Radiation and Radio Waves all have the same: Speed Notation for the three highest energy electrons. A 3 dimensional region around a nucleus where an electron may be found: Orbital Product of the frequency and the wavelength equals the: Number of waves passing a point in a second B. Speed of the wave C. Distance between wave crests or D. Time for one full wave to pass. An atom is electrically neutral because: The number of electrons are equal to the number of protons. The number of orbitals for D is: Five According to the particle model of light cannot eject electrons from metals because: The energy of the light is too low. Photons of light need to have enough energy to eject an electron. The energy of a photon is given as E = (Planck's constant) * (frequency) As the atomic number increased, the atomic radius decreases. Ionization energy move: Electrons In the Conductivity Lab me and my group were instructed to create our own lab and reach a conclusion on which random substances we mixed together with 10 ml of water would conduct electricity when we dissolved it in water.
Our control for this lab was Tap Water, because we knew that distilled water would not conduct electricity because of the numerous chemicals that have been cleaned out of it, which tap water would still have conducted. For our indicator to tell us whether it conducted electricity or not is a "ghetto" battery charged tool. There were two lights to tell us whether it conducted electricity or not. Red Dim-low conductor Medium-good conductor High-High conductor Green Dim-good conductor Medium-good conductor High-High conductor If both the green and red lights were on together then you knew that this substance was a great conductor of electricity. 5 Substances Used including our control (tap water) Tap Water-Green -Red/Medium Pure water itself does not conduct electricity and since tap water is not pure, there are a variety of other compounds within it, electrolytes that conduct the electricity through the water. Citric Acid- Red -Red/Green-Dim Citric Acid can conduct electricity, it is an electrolyte and it carries electricity. Sugar-Yellow -no color/does not conduct electricity Non-electrolyte substance, that does not produce ions or conduct electricity in water. Lithium Chloride-Orange -Red/Green When it is not in a solid and there would be free moving ions to conduct electricity. Fructose-Blue -no color/does not conduct electricity Does not conduct any electricity to turn either the green or the red light on. 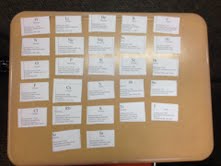 This is a picture of the re-created Periodic Table we created. In this activity we created our own Periodic Tables. We were given cards with the names and properties of elements and then had to group the different elements together in a way that made sense and we were able to defend and discuss why they are where they are placed. Since elements on the Periodic Table are group into families that have the common or same properties that is what we created again in different types of groups.
Pre-Lab Questions 1.What is an element? An element is a pure substance that is made from a single type of atom. Elements are the building blocks for all the rest of the matter in the world. Some examples of elements are oxygen, iron, hydrogen and helium. Even though elements are all made from the same type of atoms, they can still come in different forms. Depending on their temperature they can be solid, liquid, or gas. They can also take different forms depending on how tightly the atoms are packed together. Scientists call these allotropes. One example of this is carbon. Depending on how carbon atoms fit together they can form diamond, coal, or graphite. There are three families of elements. Elements are group together because they may have the same type of properties. Noble Gases - Helium, neon, argon, krypton, xenon, and radon are all noble gases. They are unique in that the outer shell of their atoms is full of electrons. This means they don't react much with other elements. They are often used in signs as they glow in bright colors when an electrical current is passed through them. Alkali Metals - These elements have just 1 electron in the outer shell of their atom and are very reactive. Some examples are lithium, sodium, and potassium. Other groups include transition metals, nonmetals, halogens, alkali earth metals, actinides, and lanthanides. 2. What is the atomic mass of an element? It is the total number of protons plus the total number of neutrons in the atomic mass. (amu) Example: Oxygen has 8 protons and 8 neutrons=16 amu 3. What is the atomic number of an element? The number of protons that are in the nucleus. Each element has a different number that identifies how many protons are in one atom of that element. All hydrogen atoms and only hydrogen atomsFor example, all hydrogen atoms, and only hydrogen atoms, contain one proton and have an atomic number of 1. All carbon atoms, and only carbon atoms, contain six protons and have an atomic number of 6. Oxygen atoms contain 8 protons and have an atomic number of 8. The atomic number of an element never changes, meaning that the number of protons in the nucleus of every atom in an element is always the same. 4. How many atoms of each element are present in molecules of the following compounds? a) HCl One atom of H and one atom of CL, so two atoms. b)H2O 2 Hydrogen and 1 Oxygen, so three atoms. Post-Lab Questions 1. How many groups or families of elements are in your table? There were a total of four groups in my table of elements that I recreated and constructed. 2. What criteria did you use to choose which group or family an element belongs to? We arranged our table in order of atomic mass going down and going from the left to right. 3. Is there a trend in atomic mass going across your table? Is there a trend in the atomic mass going from top to bottom? Our main point of our reconstructed Periodic Table was the trend of increasing atomic mass going down and across our table. 4.Are there any exceptions to these trends? If so, which elements break the trend. None of the elements we were given and slipped into the table broke the trend of ascending atomic mass. 5.Are there any holes or gaps in your arrangement? Each element that we had in our table found a place that correctly sat in the table without creating any gaps or holes in our table. Extension Questions: 1.After we added several other elements to our table after creating our idea of a new periodic table we were able to fit these additional other elements into our table with no problems. The table only changed by adding the elements and making each group larger and adding length to each line of elements. 2. Our table is very similar to a modern periodic table because we have elements with the same description grouped together and each line has element with an ascending atomic mass. 3. Why is iodine placed after tellurium on the periodic table if the atomic mass of tellurium is greater than that of iodine? The Periodic table is based on the number of protons in an element and Iodine has more protons than tellurium. 4.Mendeleev left the noble gases out of his periodic table for a very good reason: they were not known, and there were no known elements with similar properties which would lead him to suspect that they existed. 4. 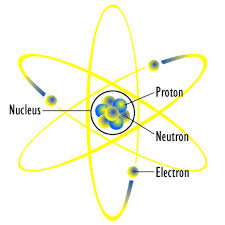 The Atom is made up of three particles
-neutrons -electrons -protons The neutrons are neutral, protons are positive, and electrons are negative. The protons and neutrons live inside of the nucleus. The electrons are on the outside of the nucleus. Atomic mass is number of neutrons and protons in the atomic nucleus. It is different from the atomic number because whereas atomic mass counts nucleons, atomic number counts the protons within the nucleus. An element is a pure chemical substance that is made up of one specific atom. They can be distinguished by the atomic number. Atomic number is the number of protons within a nucleus. Every element is different, but there can be variations of the elements and they are known as isotopes. They have the same number of protons, but the amount of neutrons differ. For example carbon-13, carbon-14, and carbon-15 are isotopic variations for carbon. Respectively, their mass numbers (13, 14, 15) are what make all three carbons different even though there are not three different carbons on the Periodic Table. Atomic Structure 101 Atoms are made up of electrons (negative), neutrons (neutral), and protons (positive). Electrons surround the nucleus, which is made up on neutrons and protons. Atomic mass is the number of protons and neutrons in an atoms, and atomic number is the number of protons singularly. An isotope is a variation of an element, such as carbon-13. Below is an example of how to calculate the average atomic weight of an element in the Periodic Table. Which I chose Carbon. Each exact atomic weight is multiplied by its percent abundance (expressed as a decimal). Then, add the results together and round off to an appropriate number of significant figures. Carbon mass # exact weight % 12 12.000000 98.90 13 13.003355 1.10 This is the solution for carbon: (12.000000) (0.9890) + (13.003355) (0.0110) = 12.011 amu Isotope Isotopes are variants of a particular chemical element such that, while all isotopes of a given element share the same number of protons in each atom, they differ in neutron numbers. Scientists behind the Atomic Structure Newton- England 1704 Newtons significance to the history of the atomic structure of an atom is he began the theory and to understand that all atoms or particles move and are not stationary. Dalton- England 1803 John Dalton is the man responsible for creating Dalton's Theory.
Rutherford-USA 1911 Ernest Rutherford was the man in the early 20th Century was the gold foil experiment. He shot Alpha Atoms through an extremely thin piece of gold foil, to see where on the surrounding wall it hit. He thought they would all go straight through, but that wasn't the case. A small amount went off to the side or towards the back. This then meant that there was something in the center of the atoms, which is the nucleus. This is where the nuclear model of an atom comes from. The freezing temperature is where a substance turns from a liquid to a solid and melting temperature is the temperature where a substance turns from a solid to a liquid. We had to investigate the cooling and warming behaviors or the substance water. Then we looked at our graphs created on Logger Pro and determined and compared the freezing and melting temperatures of water. 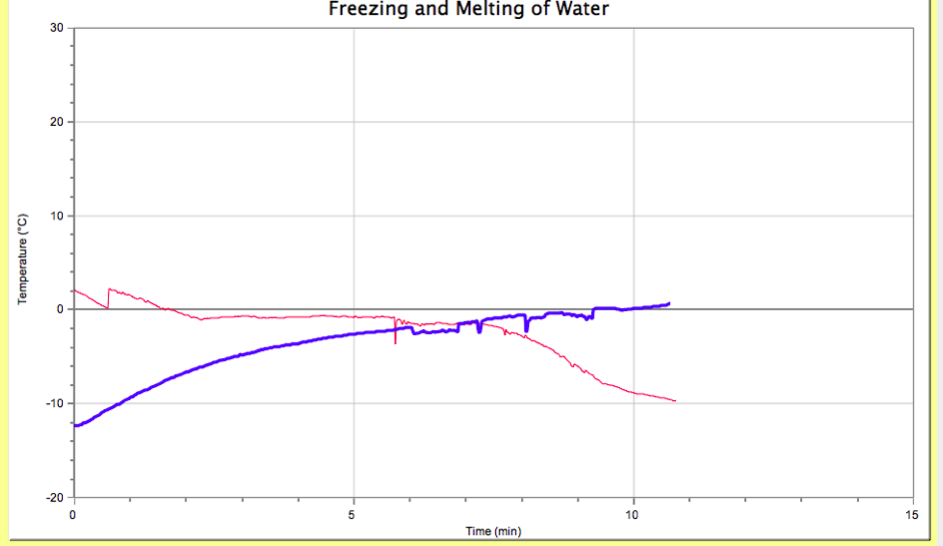
What do the different slopes on temperature vs. time graph mean?
Why add salt? On the side of the Ice Cream Salt box it lists the uses of what you can use the salt for because it has melting and freezing properties. - Freezing Ice Cream - Melting Ice & Snow -Sprinkle Morton® Ice Cream Salt on steps, sidewalks and driveways for fast melting. Notice: The use of salt for melting ice and snow may induce or accelerate damage to certain concrete surfaces. To help minimize surface damage, use only enough salt to melt the snow or loosen the ice, then promptly remove the slush formed. - Fast Cooling: Sprinkle Morton® Ice Cream Salt liberally over ice in which beverages (cans or bottles) or watermelon have been placed. This will result in more rapid cooling at lower temperatures than is possible with ice alone. Melting Salt melts ice because it lowers the freezing point of water. Water freezes at 32 F Water with salt or any other substance in it will freeze at a lower temperature. The coldness of the temperature depends of what you use. https://docs.google.com/a/lajunta.k12.co.us/document/d/19pyfBW6sAu_yQoj7oUa8HgyHlJ7-YZd2hpzWjChCgT4/edit
The link atached above: Questions from the Chemistry and Matter Change Textbook: Pages404-409 Q:24-26, 54-60 In the Mixture and Separation Lab Kari and separated three substances from another groups random mixture which at first we didn't know what was in it. But then discovered that it was Copper, Black Sand and Salt. We first minimized the possibilities. Since I knew what copper looked like I suspected that's what the small chunks of metal were, so I was able to sift that out with a filter. Then what was left was the two grainy mixtures that were black and white. The black grainy mixture at first made me think it was iron. But when we got the magnet to test it, it wasn't magnetic, so iron was out. Then we figured out for sure that it was the black sand. The last mixture to figure out was a white grainy substance. So it was either white sugar, white sand, or salt. The only way we figured out how to test it was by taste. When I tasted it I ruled out sand, and sugar because it wasn't sweet, it was salty, therefore it was salt. Now how were we going to separate the salt and black sand? We decided to pour it in a beaker of water because I knew the salt would dissolve but then we lost our weight in salt at the end of the experiment. The black sand all floated to the top and the salt sunk to the bottom and dissolved. Then we filtered out all the water. Then I took the remaining mixture of the salt and sand and subtracted the new weight of the sand and got the weight of the salt. Then I separatly weighed the copper that I had separated and filtered out in the start.
Start: Salt 5.50 Grams Copper 8.99 Grams Black Sand 5.06 Grams Finish: Salt 4.60 Grams Copper 8.94 Grams Black Sand 6.15 Grams The before and after effect of the correct weight of the copper was really close, but that wasn't the case with the salt and black sand. I think it was because the salt didn't dissolve in the beaker with the black sand but it settled with the sand when we seperated it out. That is why the end result of the sand was heavier and the remaining mixture of the salt was considerably lighter. 90% error | AuthorMy name is Erica Harris and I am a Junior at La Junta High School. This is my blog for my Chemistry class. ArchivesMarch 2014 Categories |
| Erica's Chemistry Blog |
|

 RSS Feed